Simple Spring and JPA with Hibernate tutorial. Part 2: Forms and persisting entities
Continuing from the very basic spring example we did last week, we’ll add some more features to demonstrate some more basic JPA and Spring functionality:
- Spring forms
- Spring model attributes
- Persisting and merging entities in JPA
At the end of the post you can see instructions on how to get the source code. Since we’re building up from the previous example, we’ll only go over the parts that have changed: We start by looking at the Person DAO, in which we added two methods, one to persist person objects, and another to query a person, based on the id. The corresponding interfaces for the DAO and service classes have also been updated with the new methods.
@Repository
public class PersonDAO  implements IPersonDAO {

    @PersistenceContext
    private EntityManager em;

    @Override
    public List<Person> findAll() {
        Query query = em.createQuery("SELECT e FROM Person e");
        return (List<Person>) query.getResultList();
    }

    public void persist(Person person) {
        em.merge(person); //1
    }

    public Person findById(Long id) {
        return em.find(Person.class,id); //2
    }
} - The merge method persists the state of the object. If the object doesn’t exist (if it has no id, or an object with the passed in id does not exist in the database) a row in the database will be created.
- The find methods allows to find a entity of a particular class, based on the id. This could also be achieved using an JPQL query.
In the person service class, we simply added two delegate methods to the DAO.
@Service
@Transactional
public class PersonService implements IPersonService{

    @Autowired
    private IPersonDAO personDAO;

    @Override
    public List<Person> findAll() {
        return personDAO.findAll();
    }

    @Override
    public Person findById(Long id) {
        return personDAO.findById(id);
    }

    @Override
    public void persist(Person person) {
        personDAO.persist(person);
    }
}
Now we look at the controller, in which we added several three methods that handle requests. One to display the UI to edit an existing record, one to display the UI to enter a new record, and one we we post the modified or new entry.
@Controller
public class TestController {

    @Autowired
    private IPersonService personService;

    @RequestMapping(value="/view",method = RequestMethod.GET)
    public ModelAndView view() {
        ModelAndView ret=new ModelAndView("view");
        List<Person> persons=personService.findAll();
        ret.addObject("persons",persons);
        return ret;
    }

    @RequestMapping(value="/view/{id}",method = RequestMethod.GET)  //1
    public ModelAndView viewById(@PathVariable Long id) { //2
        ModelAndView ret=new ModelAndView("person");
        Person person=personService.findById(id); //3
        ret.addObject("person",person);
        return ret;
    }

    @RequestMapping(value="/new",method = RequestMethod.GET)
    public ModelAndViewnewPerson(Person person) { //4
        ModelAndView ret=new ModelAndView("person");
        ret.addObject("person",person);
        return ret;
    }

    @RequestMapping(value="/post",method =  RequestMethod.POST)
    public ModelAndView post(Person person) { //5
        ModelAndView ret=new ModelAndView("view");
        personService.persist(person); //6
        List<Person> persons=personService.findAll();
        ret.addObject("persons",persons);
        return ret;
    }
} - The first new method allows to view an edit a specific person, base on the person’s id. A new notation is introduced here, to pass variables from the URL. In this case, variables surrounded by brackets (in this case
{id}) are passed as variables annotated with@PathVariable. We also specify that this method will only be invoked for GET requests. - By default, path variables are mapped based on name of the paramenter and the name in the url. A different name can be specified by changing the annotation
@PathVariable("locationId"). - We utilize one of the new methods we created in the service classes to find the person given the id. We then pass that person to the model.
- The
newPersonmethod declares a Person object in its signature. This is a model attribute. Since this attribute is not yet bound, and empty Person object will be passed. We pass this object to view. - In the
postmethod, we have a similar method signature with thePersonobject. In this case we do expect the object to be bound, since it’s coming from a form which we’ll see a bit later. - We use the person service to persist the person object we received from the form, and then retrieve the list of all persons in the system.
To expose the new functionality, we have to make a few changes to the jsp we we using to display the persons:
<%@ taglib uri="http://java.sun.com/jsp/jstl/core" prefix="c" %>
<html>
    <body>
        <table border="1">
            <tr>
                <th>First Name</th>
                <th>Last Name</th>
            </tr>
            <c:forEach items="${persons}" var="person">
                <tr>
                    <c:url var="personUrl" value="view/${person.id}.html"/>  <%-- 2 --%>
                    <td>
                        <a href="${personUrl}">
                            ${person.firstName}
                        </a>
                    </td>
                    <td>
                        <a href="${personUrl}">
                            ${person.lastName}
                        </a>
                    </td>
                </tr>
            </c:forEach>
        </table>
        <a href="new.html">Click here to add a new entry</a>  <%-- 3 --%>
    </body>
</html>- We use the
urltag to put together a url that includes the person id, and we store it in a variable namedpersonUrl. Using theurltag is good practice since it takes into account the context of the application when creating urls. We then add the proper tags to link from each person. - We add a simple link to a new page, that will enable us to create a new person record.
We also add a new jsp that allows us to edit and create new persons.
<%@ taglib uri="http://java.sun.com/jsp/jstl/core" prefix="c" %>
<%@ taglib uri="http://www.springframework.org/tags/form" prefix="form"%>  <%-- 1 --%>
<html>
    <body>

        <c:url var="postUrl" value="/post.html"/>  <%-- 2 --%>
        <form:form method="POST" commandName="person" action="${postUrl}">  <%-- 3 --%>
            <form:input path="firstName" />  <%-- 4 --%>
            <br/>
            <form:input path="lastName" />
            <br/>
            <form:input path="email" />
            <br/>
            <form:hidden path="id" />  <%-- 5 --%>
            <input type="submit" value="Submit">  <%-- 6 --%>
        </form:form>
    </body>
</html> - We add another tag library, in this case the Spring form library which enables us to work with model attributes (in this case the Person object).
- We use the url tag to put together the url where we’ll post our form.
- The
form:formtag will render as a normal form html tag, but it takes a lot of the work of setting it up, if used within the scope of Spring MVC. Other than the standard “method” and “action” parameters, the tag takes acommandName, which is the name of the model attribute that will be passed from the controller. It defaults tocommand, but for this example we’re specifyingpersonto make it more readable. - Tags such as
form:inputmimic standard HTML tags, but provide wiring to model attribute through the “path” attribute. In this case the field will be wired to the data of the fieldfistNamein the person object. - A hidden field ensures we send the id of the person object (in case we’re editing an existing one). This will ensure we update the current record, and not create a new one.
- A plain submit HTML button is all that’s needed to complete the form.
We can then compile and run our small application with:
mvn tomcat:run
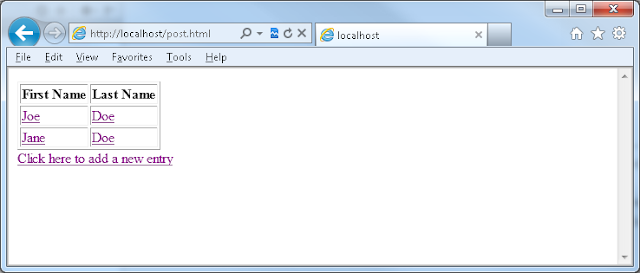
You can open a browser and see the the application running at http://localhost:8080/spring-hib-jpa/view.html:

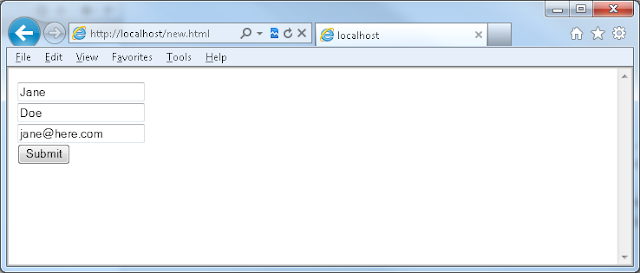
You can also add new people by clicking “Click here to add a new entry”:

Source Code
You can clone the code and play with it from github:
git clone https://github.com/aolarte/tutorials.git
The finished code is contained in directory spring2_forms. If you want to start with the base code, use the directory spring1_basics.
Simple Spring and JPA with Hibernate tutorial series:
- Part 1: The basics
- Part 2: Forms and persisting entities
- Part 3: Simple security


Comments